VICODO WEBSITE SUPPORT CONTENT
WHAT IS BRANDING SETTINGS
The branding section is where you can showcase the identity of your company by customizing the invitation page.
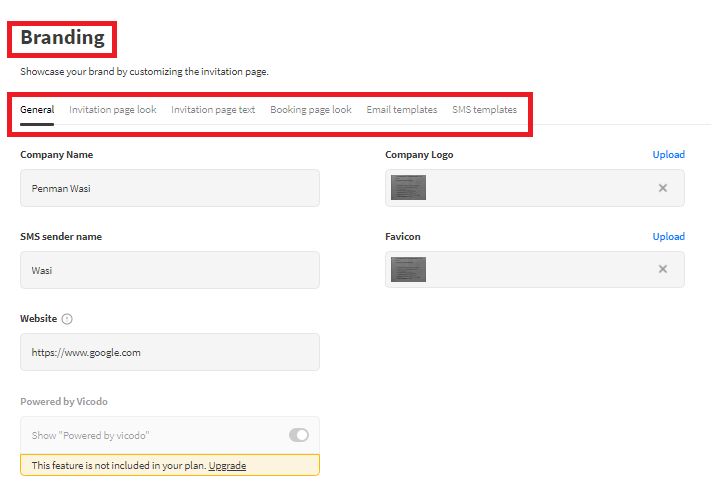
The branding section is sub-divided into 6 sub-sections: General, Invitation page look, Invitation page text, Booking page look, Email templates, and SMS templates. But here, the first three subsections will be discussed in detail.
These subsections will explain how you can display your company name, website link, company logo, and alter display page settings to optimize design, color and texts. You can also decide what message to send to your scheduled and unscheduled meetings.
ADDING COMPANY NAME, LOGO, AND WEBSITE LINK
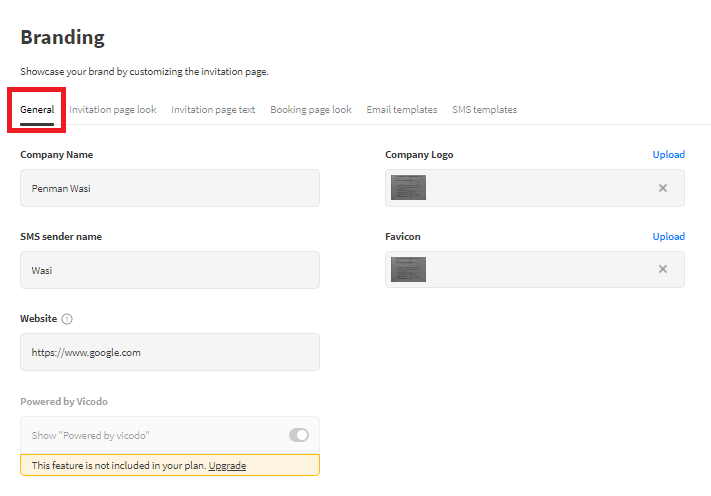
In the “General” tab, you can add introduce your company’s basic information to your clients.
The following guidelines explain the fields in brief:
- Company Name: Add your company name here like “YouTube”, “Skype” etc.
- Company Logo: Upload your company’s unique brand logo.
- SMS Sender Name: Add the name you want to show the receiver of your message.
- Favicon: Upload the image as your company branding and help your client easily locate your web page on the internet browser tab.
- Website: Link your website URL as a hyperlink to your logo. Your client will land directly on your website.
- Powered by Vicodo: Disable it to remove the vicodo branding during the video call. This feature cannot be disabled in the trial plan. Upgrade to “Enterprise plan to remove vicodo branding.
MODIFYING MEETING PAGE LAYOUT
In “Invitation Page Look”, you can customize the appearance or display of the meeting page layout.
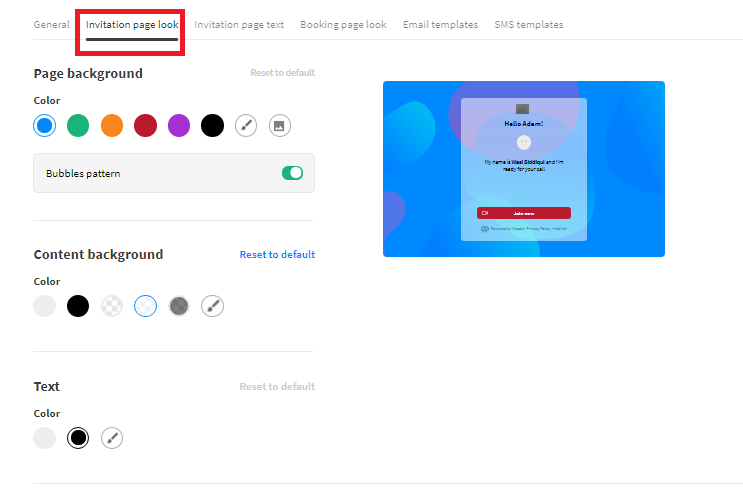
The following guidelines explain the fields in brief:
- Page Background: Change solid background color from preset color options or choose a customized color from the color palette either manually or by adding color hex code.
You can also upload your desired image which will be displayed across the full page by clicking the image icon at the end.
You can also disable “Bubbles Pattern” to remove the pattern from the background.
- Content Background: It changes the color of the dialogue box. There are two solid colors: (white and black) and transparency options in the ribbon
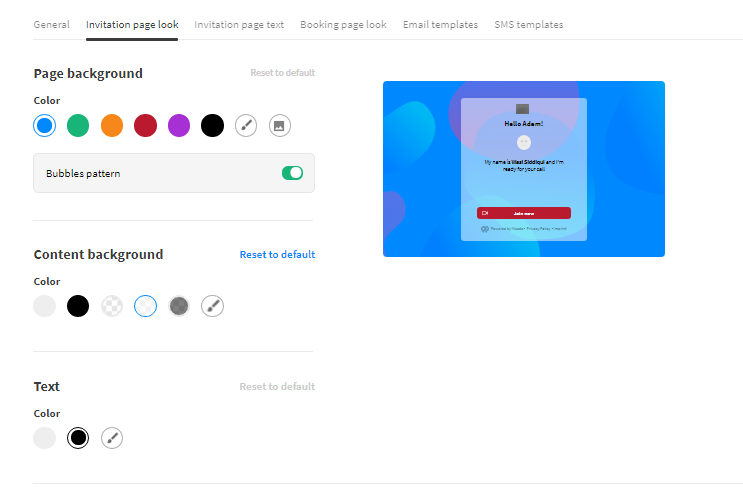
A dedicated customized color option at the end changes the transparency level of the dialogue box as well as the color with hex code.
- Text: Change the color of the text.
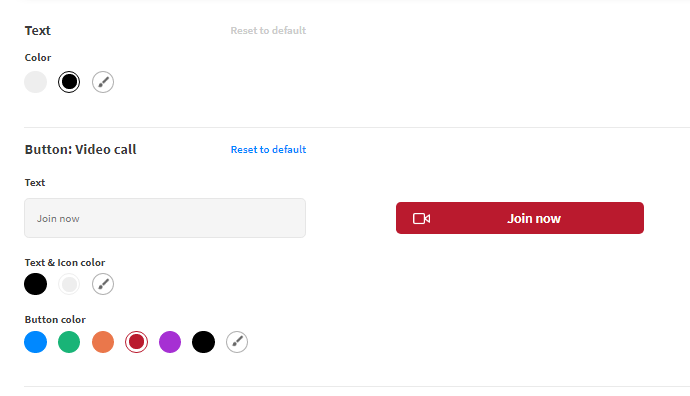
- Button: Video Call: Click this button to join a live video call. You can decide what text to display on the button, change icon, text, and button colors.
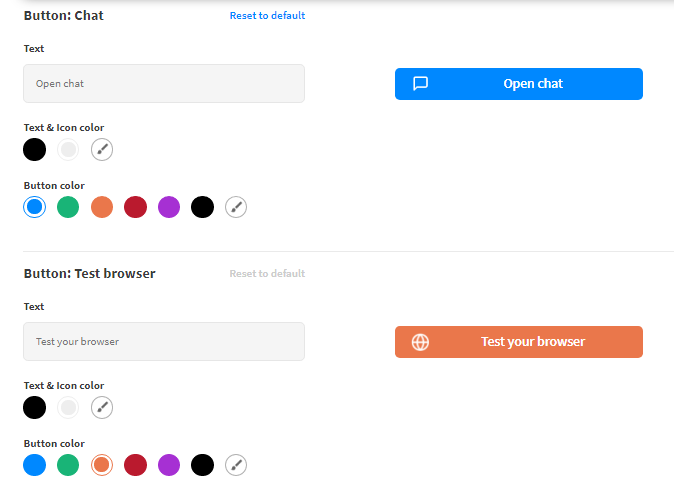
- Button: Chat: Click this button to chat with your client. You can decide what text to display on the button, change icon, text, and button colors.
- Button: Test Browser: Click this button to verify if your browser settings are ready and in order. You can decide what text to display on the button, change icon, text, and button colors.
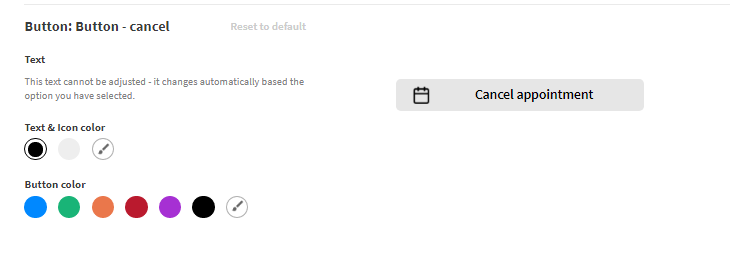
- Button: Button - Cancel: Click this button to cancel any appointment. You cannot change the text of this button because it automatically changes based on the options you select. But, you can change icons, text, and button colors.
Note: Clicking the “Reset To Default” button replaces all settings to the default preset.
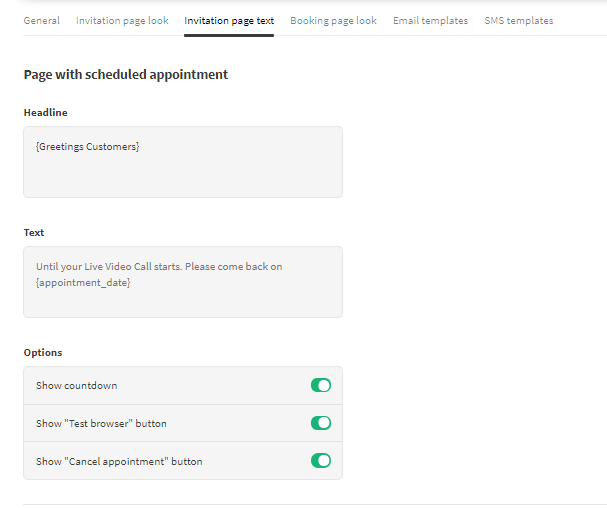
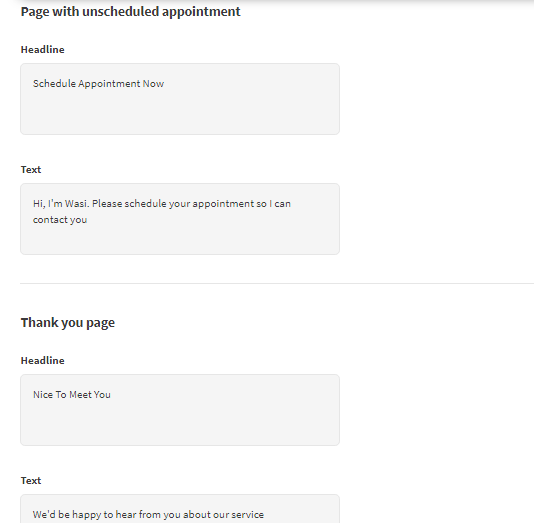
MODIFYING SCHEDULED & UNSCHEDULED MEETING PAGE TEXT
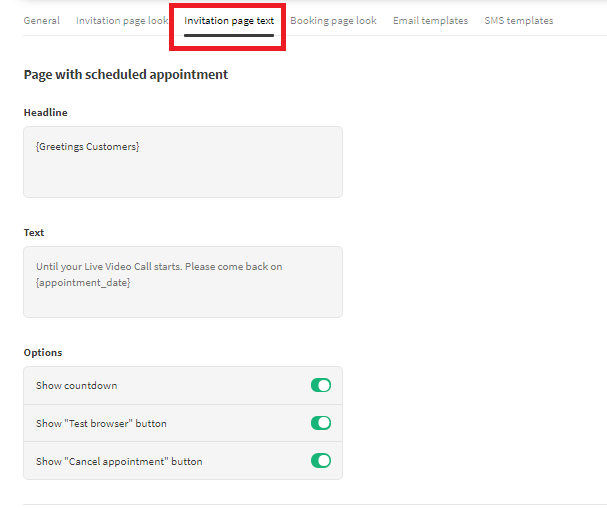
In “Invitation Page Text”, you can decide what text to display whether in the scheduled or unscheduled appointment.
The following guidelines explain the fields in brief:
- Page with Scheduled Appointment: “Headline” section is where you greet your client like “Hey there” etc.
The “Text” section is where you send a short message to the client like “I will be waiting for you” etc.
Enable/disable options to show buttons of countdown time, test the browser or cancel an appointment.
- Page with Unscheduled Appointment: Here the “Headline” and “Text” section does the same function as the schedule appointment section.
- Thank You, Page: This page is shown when the video call is finished with your client. It has the same “Headline” and “Text” sections and does the same function with a scheduled and unscheduled appointment.
Post a comment